
This is a copy of an interview I did with Urban Threads, a fantastically geeky embroidery company. I’ve used their designs on several projects. This originally appeared on their StitchPunk blog in July 2011.
Today’s featured project is keeping with our theme of everything steampunk, and I’m so excited to share this one with you!
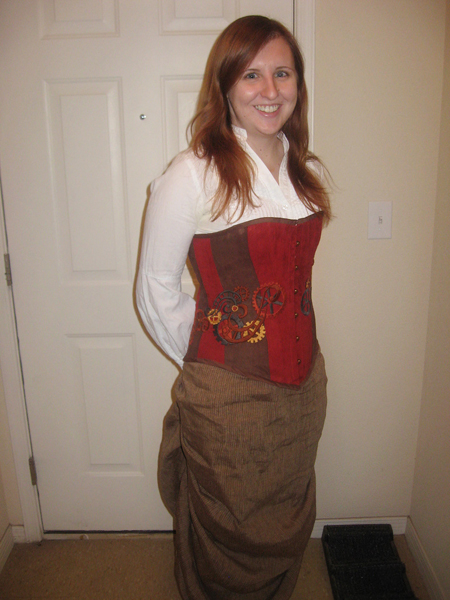
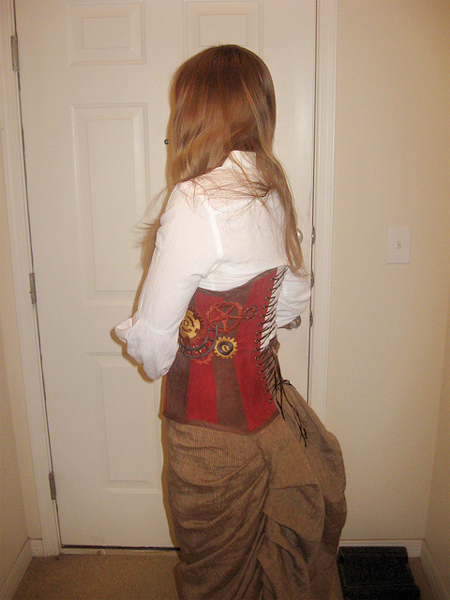
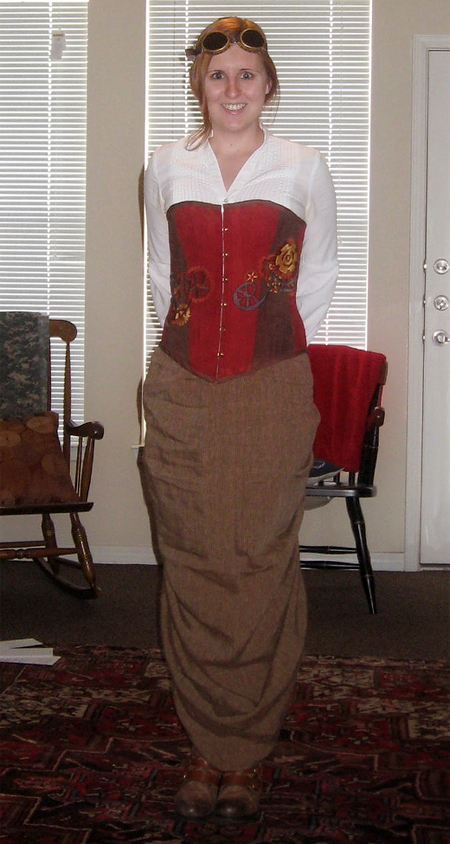
Hand embroiderer Annie Maura (that’s right, this is hand embroidered) made this truly amazing steampunk corset to complete her geartastic costume, and she’s here to tell us a little about what went into this project, how crazy she is for trying this as a newbie, and how much she rocks at steampunk style!
Tell us a bit how you got into steampunk, and what inspired this project?
I guess I mostly got into steampunk through books and looking at pictures online of other people’s creations. It seems like a natural progression from growing up in a household where three airships chase each other around the top of the Christmas tree every year.
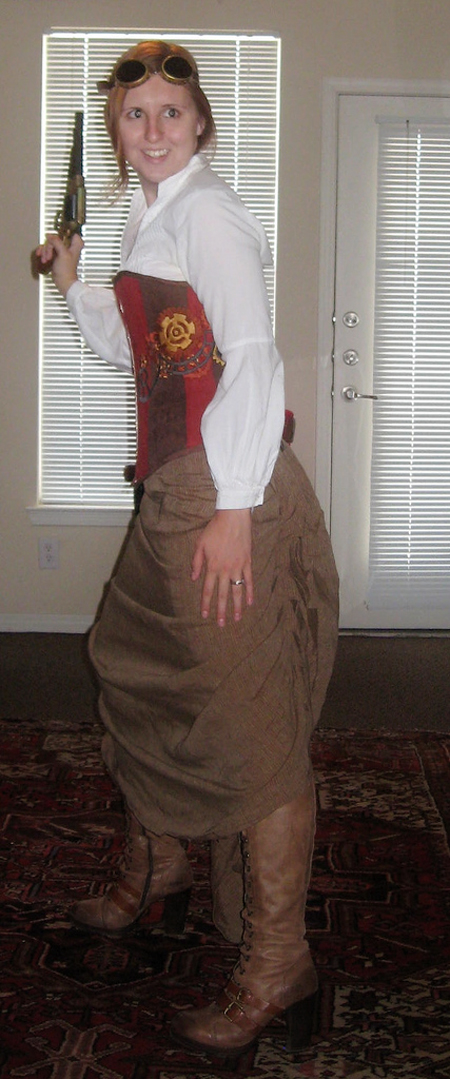
I’ve been costuming for a few years now and I realized that steampunk was a serious gap in my wardrobe. I think finding the boots was probably the final thing that inspired me to get to work.
Since you mention it, you might as well let us know where you got those boots, since I know people are going to ask! Like for instance, myself…
The boots! My husband and I were in Las Vegas for Thanksgiving last fall when we walked by the windows at ALDO and I saw them. I immediately went inside to investigate and found that they were rather outside my price range, but oh, so beautiful. After dinner, my husband, who had been struggling to find me a present for our fast approaching anniversary, decided that I had just picked out my gift. He liked the boots because they reminded him of WWII US Army Tanker Boots. He bought me the boots and I bounced up and down like a small child for the next two days. I found that you can still buy them on Amazon here [Sorry! I can’t find these boots anymore. Niamh from Urban Threads did buy herself a pair as a result of this interview. You can see her wearing them in some of their Steampunk photoshoots.]
What amazing embroidery! Talk us through what it was like embroidering this by hand. Do you love or hate satin stitches now?
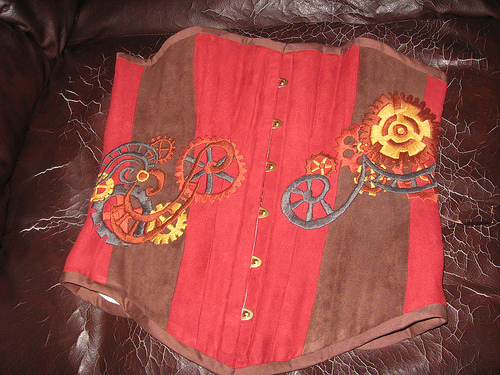
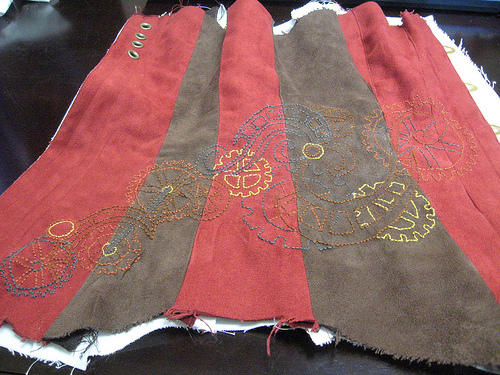
Believe it or not, this was actually my first embroidery project. I did a test square on a swatch of fabric to see if embroidering the corset was an option or if I should find another way of embellishing it. I pieced the facing of the corset together and started work, one side at a time.
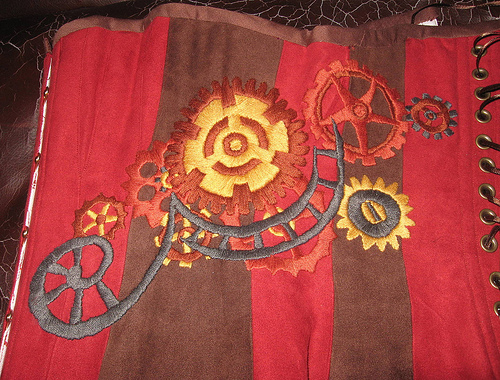
First, I combined the embroidery patterns on transfer paper and attached it to the facing. I outlined the design with back stiches, one side at a time, then ripped the paper away. This was the first chance I got to see how the colors I picked out worked together on the fabric. Even as I was filling in the design, I experimented a lot with how to fill some of the larger sections with satin stitches. Some of the gears have stitches that run rather differently from the others. I don’t really love or hate satin stitch, but I’ll be avoiding it for a while. I used buttonhole stitch for the last set of eyelets I did.
What made you choose the designs you did?
I had already established that I wanted gears of varying sizes to travel diagonally around the corset. I was experimenting with creating my own pattern when I found Urban Threads.
On the first side I used “Clockwork Magic – Cogs Border” with the omission of one cog, and the larger cogs from the bottom of “Clockwork Magic – Cogs Corner.” On the other side I subtracted two cogs from “Cogs in the Machine” and added the second flourish from “Cogs Corner” to tie it in with the other design. I played around a little bit before I found this combination. I considered including “Steam Octopus” as a reference to Gail Carriger’s “Parasol Protectorate” series, but I’m sure I’ll find some other place to put that little guy.
I can’t believe this was your first embroidery project! How long did it take you?
It took me about a month of embroidering 8-10 hours a day. How on earth was that possible? At the time I was working in a position where there were many hours spent waiting around for something to break and very little time actually spent working. To cope with this, I had previously been studying Latin and Old English at my desk. When I started this project, I switched to embroidery. It took my coworkers a few days to ask me what I was doing.
Was the corset made from a pattern, or did you design it yourself? What about the rest of the costume?
The corset was made using the Silverado pattern from Laughing Moon Mercantile, which is accurate from 1837-1899. This was my second corset made using this pattern, so I knew that if i didn’t screw anything up it would fit me perfectly. The facing is pieced from brown and red faux suede – completely not period, but I like how they look. The structure and boning are contained in the layer of white coutil underneath.
The skirt is from a Truly Victorian pattern for an 1878 Long Draped Overskirt (TV234) and is constructed in a brown pinstripe linen. I decided to go with something from the Natural Form bustle era because it doesn’t require wearing an actual bustle! I All that volume gathers in the back, but there’s no undergarment getting in the way as you explore the borders of the Empire in your airship. It was a very easy pattern to follow and it went together perfectly. The shirt is just something that I picked up at H&M years ago. I haven’t decided whether or not I’m going to replace it with something else. The goggles are a fairly recent acquisition, which I ordered from BrazenDevice’s Etsy shop [Unfortunately, it looks like this shop has closed!]. Setting them apart from many of the affordable goggles on the market, the strap is real leather and the lens frames are brass. This entire outfit is a work in progress, which I hope to continue accessorizing. I think at the very least, a hat is required.
Any interesting challenges along the way? What if anything would you try differently next time?
For some reason I inserted the busk in the center front panels before I started the embroidery. This meant that I couldn’t hoop the most central parts of the design. So, yes, I would have waited to start the real construction of the corset until after the embroidery was complete. Also, my fingertips were completely destroyed. I only use a thimble when the needle is being especially difficult. I kept thinking that they would callus, but I think I lost the top layer of skin on my thumb and forefinger at least three times. Of course, now they have some very respectable calluses.
Any advice for people looking to tackle a similar project?
An abundance of spare time doesn’t hurt, and patience. This isn’t the kind of project that can be finished quickly by pulling an all-nighter (as I am often tempted to do), so just take your time with it. And if you’re working with a new corset pattern, definitely don’t skip making a muslin. It would be incredibly depressing to finish the embroidery only to find that the corset needs to be let out or taken in.
Thanks so much for sharing Annie! I know we can’t wait to see what you add to it in the future, and I seriously can’t wait to see what amazing hand embroidery project you take on next. Something equally simple, like oh I don’t know, embroidering that steampunk octopus. Life size.
